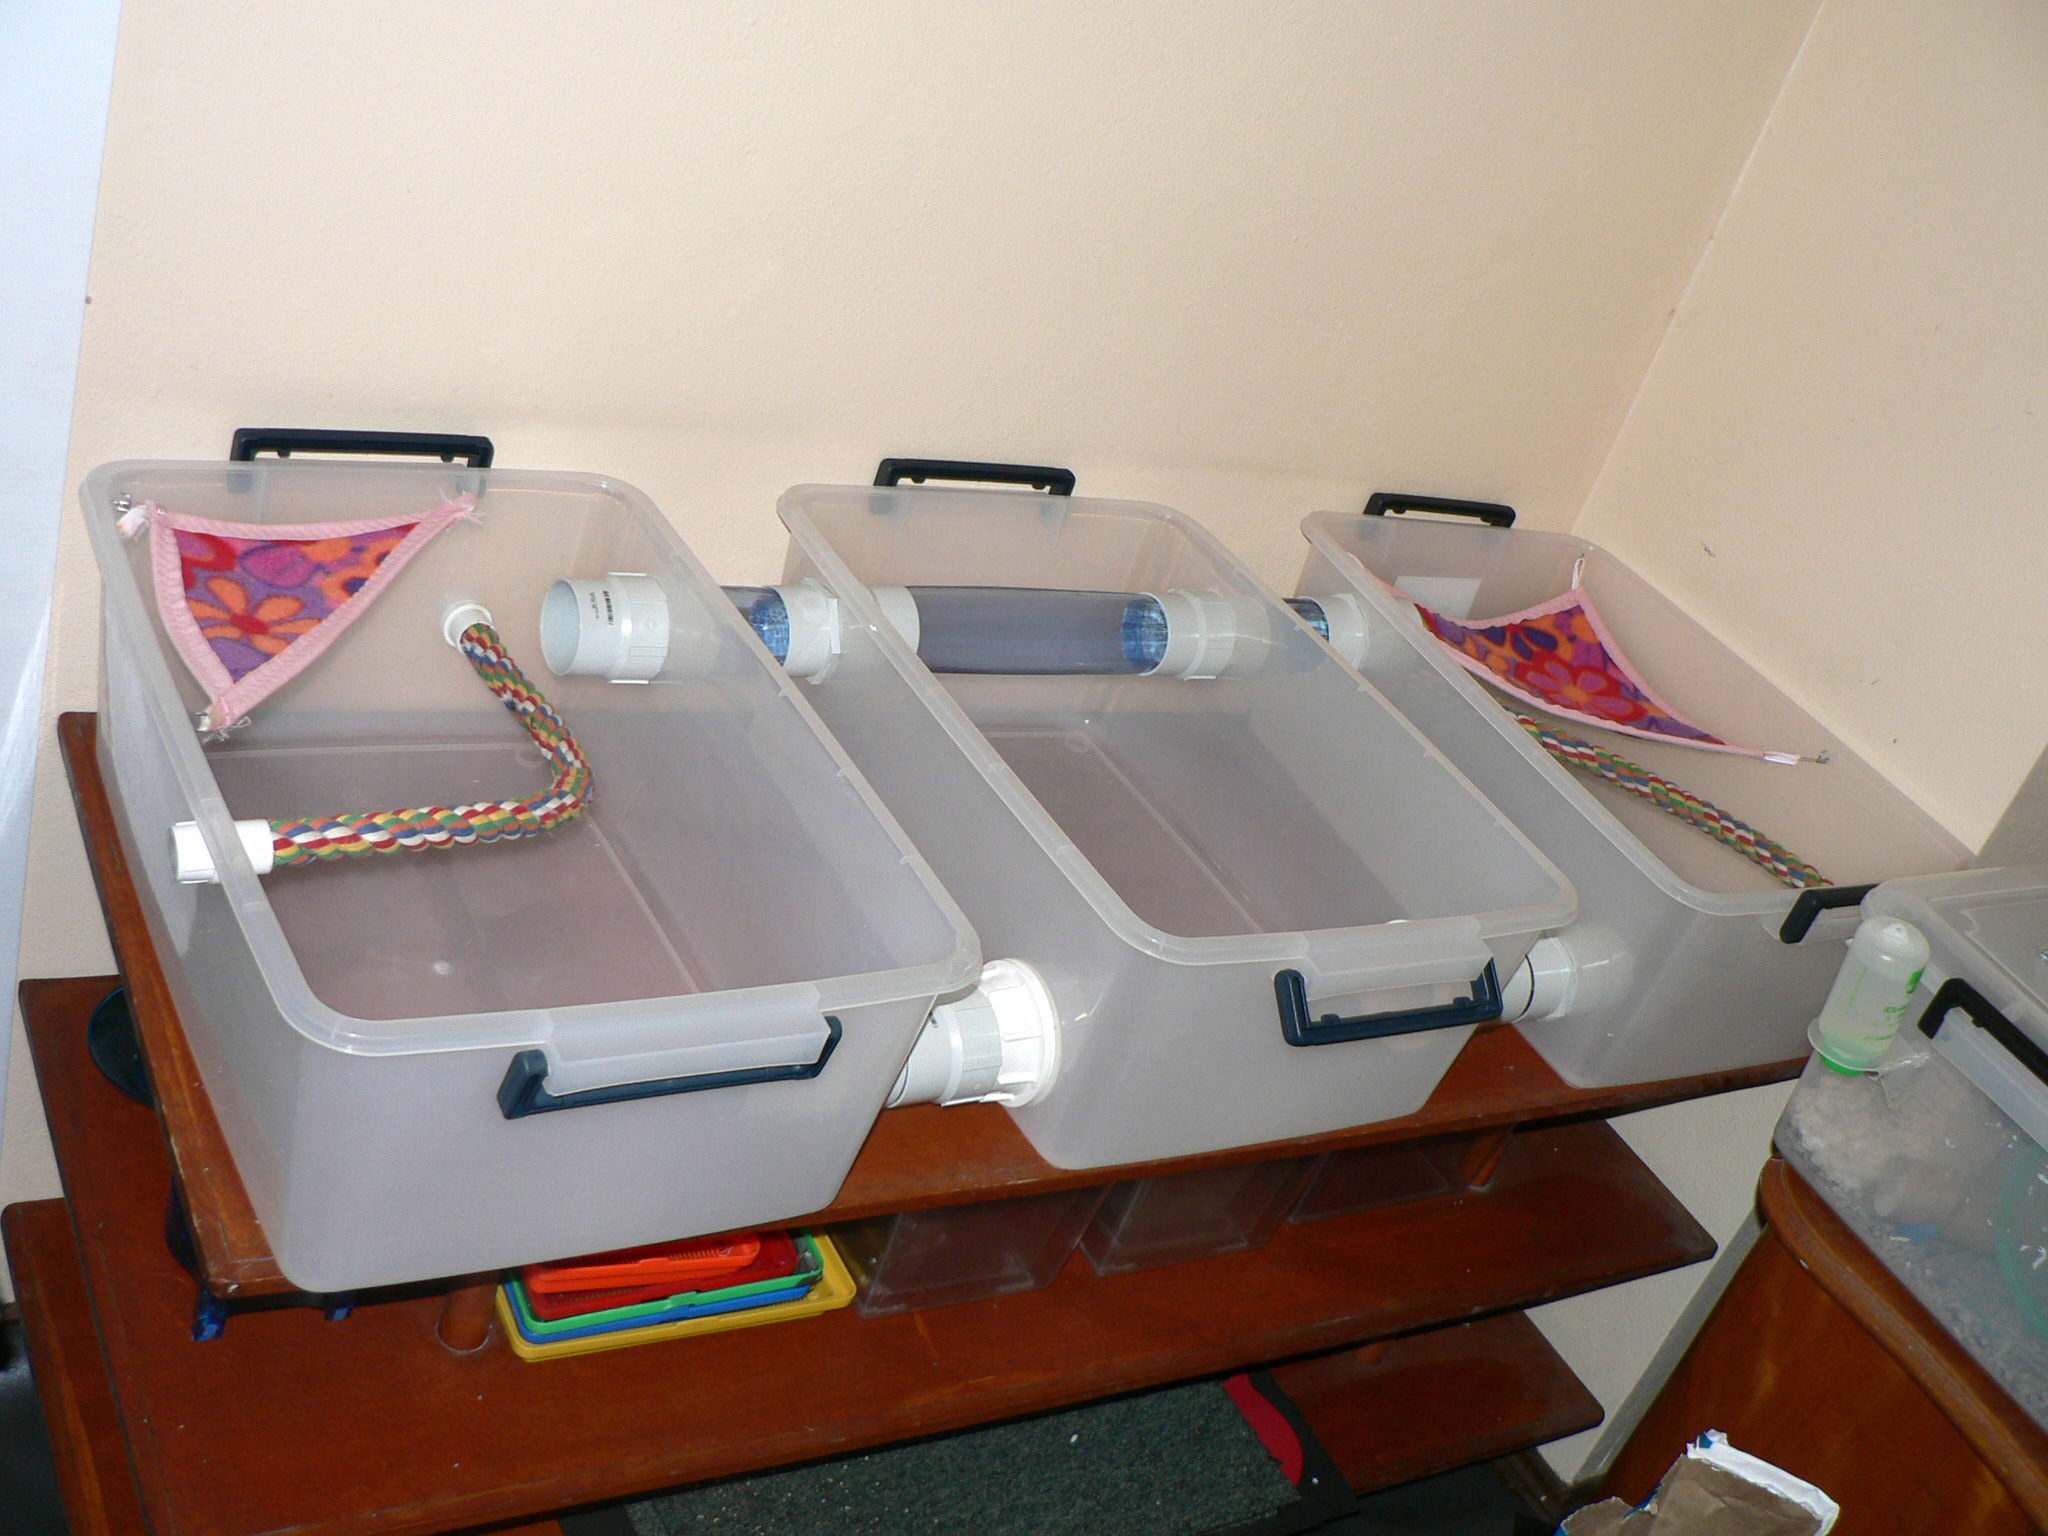
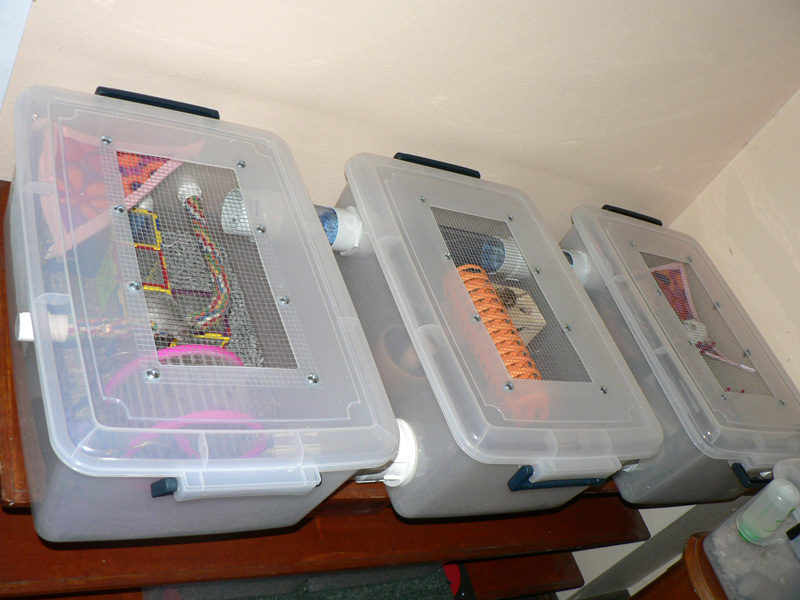
All of my mice are kept in modified plastic tubs. I’ve been making and using these for about 10 years, and found them to be vastly superior to the store-bought options for several reasons: they’re cheap, costing maybe $20 in parts; they’re easy to clean, no rooms or tubes to worry about; they last forever, with no moving parts or wire to get chewed and rusty; and they’re modular, I can stack them or fit them into shelves. I often get asked how I make my tubs, so here’s my how-to guide.
What you need
 You will need the following materials and tools to get started:
- 1 plastic tub – at least 30x45cm for enough floor space; with no contouring, corners or internal texture that could be chewed; and a tight fitting lid, shaped such that the centre can be cut out, leaving a frame for the wire to attach to
- Snake and mouse mesh – from Bunnings, 5mm squares
- 8 1/4″ 12mm bolts, nuts and washers
- Thin, pliable wire to attach the water bottle
- A drill
- A rotary cutting tool such as a Dremel
- Wire snips
If you want to make a multi-tub space joined by tubes, you will also need:
- PVC pipe joiners that screw together, and fit together (8 for each additional tub)
top joiners: [ large diameter / male thread ] screws through hole in plastic into [ female thread / large diameter ] connects outside [ small diameter / male thread ] screws through hole in plastic into [ female thread / large diameter ]
bottom joiners: [ large diameter / female thread ] screws through hole in plastic into [ male thread / large diameter ] connects inside [ small diameter / female thread ] screws through hole in plastic into [male thread / large diameter ] - A hole saw attachment for your drill
Step 1 – cut the lid
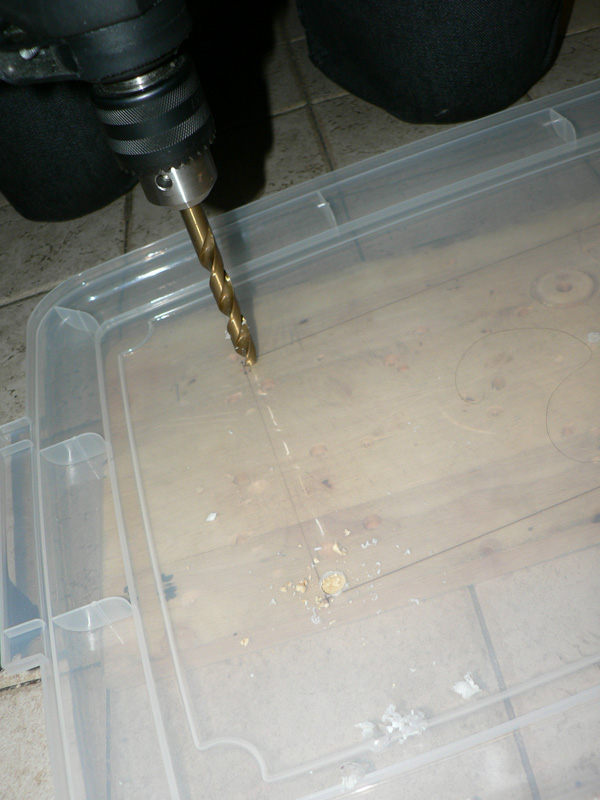
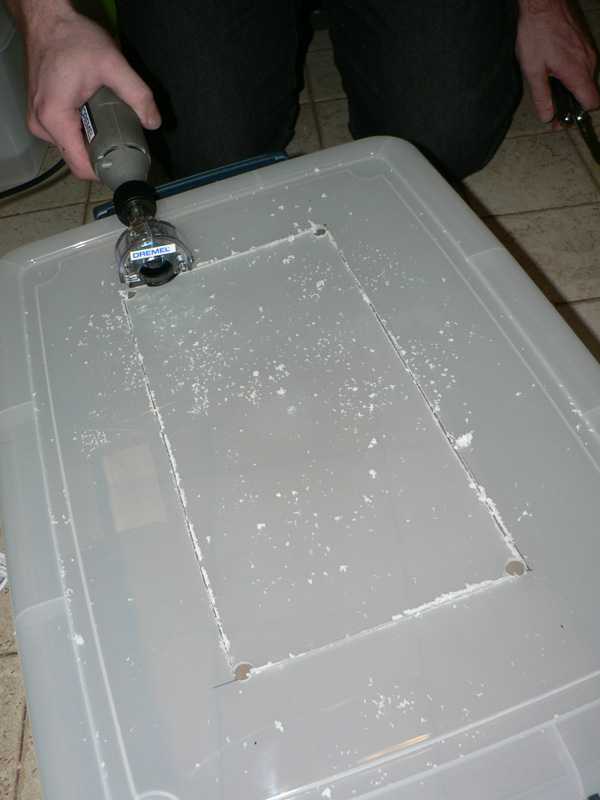
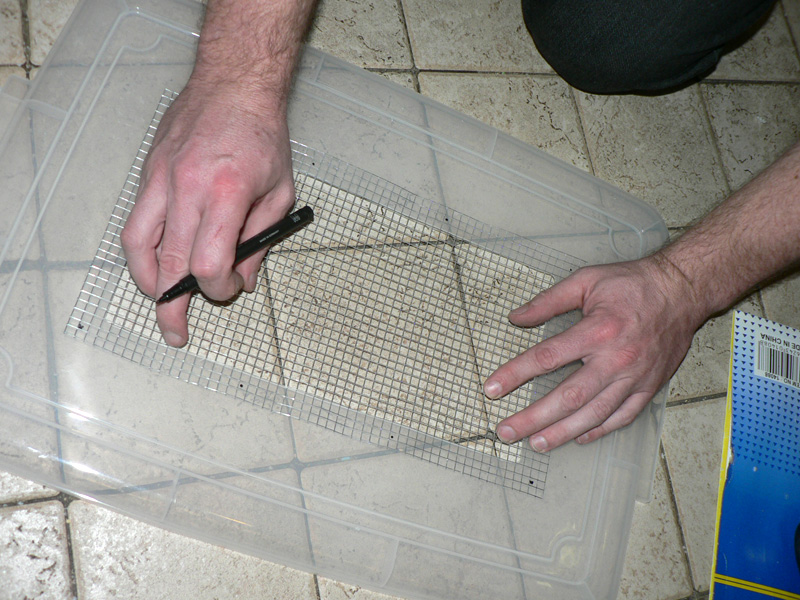
Hold the wire mesh over the lid, and work out how big your hole needs to be. You want to leave 3 squares of mesh around all sides of the hole – this will be the row that you drill and bolt through to attach the mesh to the lid. Mark where you want to cut, double check with the mesh after you’ve marked the lines. Drill 4 large diameter holes inside the corners, so that the corners are curved (rounded corners help to prevent the corners cracking). Now use your rotary tool to cut out the lid, joining the holes along the lines. Clean up the edges with a sharp knife.
Step 2 – drill the lid
Hold the wire so that it lines up with your hole – you should have 3 mesh squares against the plastic all the way around. Mark the centre of the squares one in from the edge in each corner, and then one in from the edge 1/3 and 2/3 down each of the long sides. There should be 4 marks along each long side. Drill out the marks.
Step 3 – attach the mesh to the lid
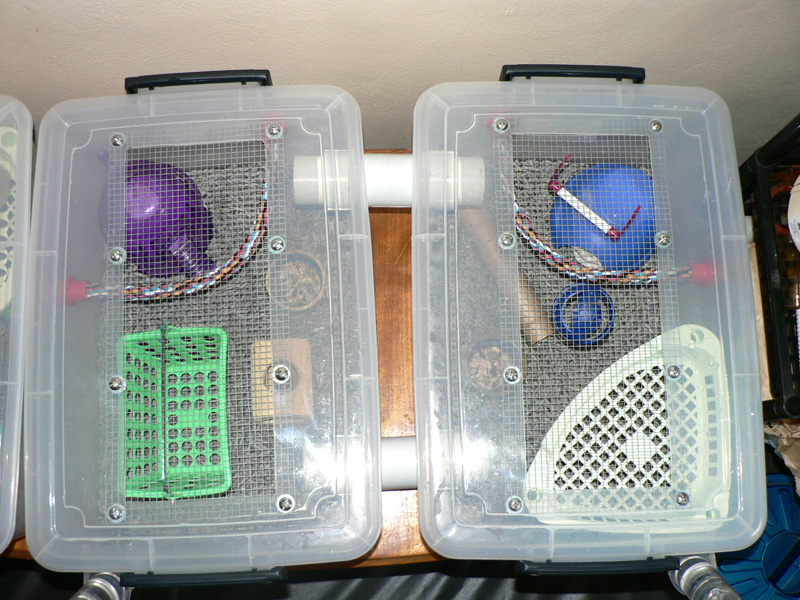
It’s important that all mesh panels are attached on the inside of the tub, otherwise the mice will have access to the edge of the plastic and chew their way out. Line up the mesh once again on the inside of the lid, and push the bolts through the wire at each hole from the outside. On the inside of the lid, add a washer, and a bolt, and tighten.
Step 4 – drill holes for the water bottle
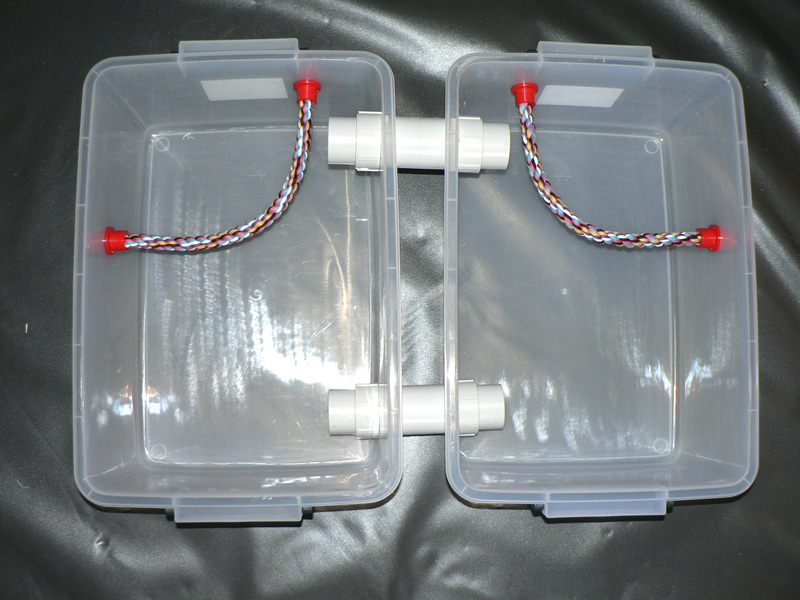
The water bottle will sit on the outside of the tub, with the metal sipper poking through a hole. Using your water bottle as a template, find the best spot to drill your hole. It should be high enough that it won’t empty into the litter, and low enough that mie can reach it easily. Also make sure it’s not obstructing the handles for the lid. Drill a hole of diameter slightly larger than your water bottle sipper, drilling out a bit more plastic at 45 degrees for a snug fit. To hold the water bottle in, you will also need 2 small holes drilled in the rim of the tub – thread your pliable wire through these, and wrap it around your water bottle.
Step 5 – drill holes for connecting tubes if making multi-tub
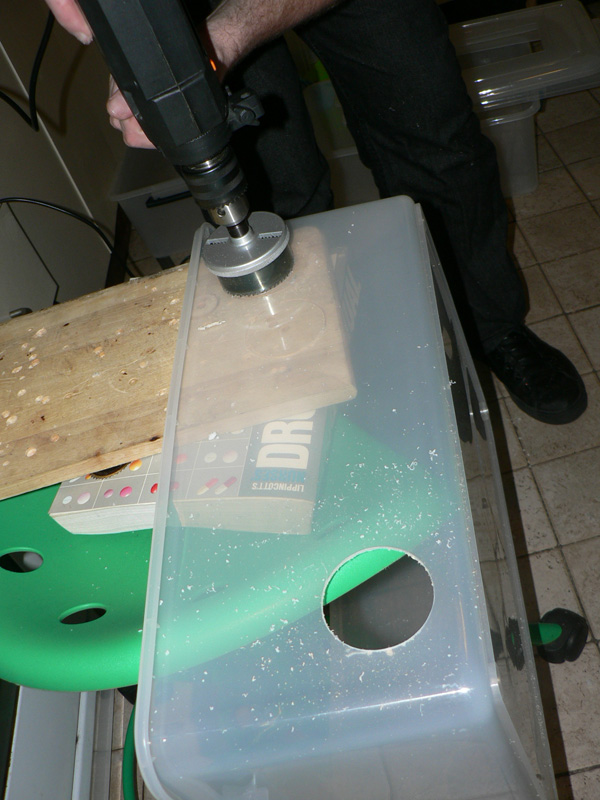
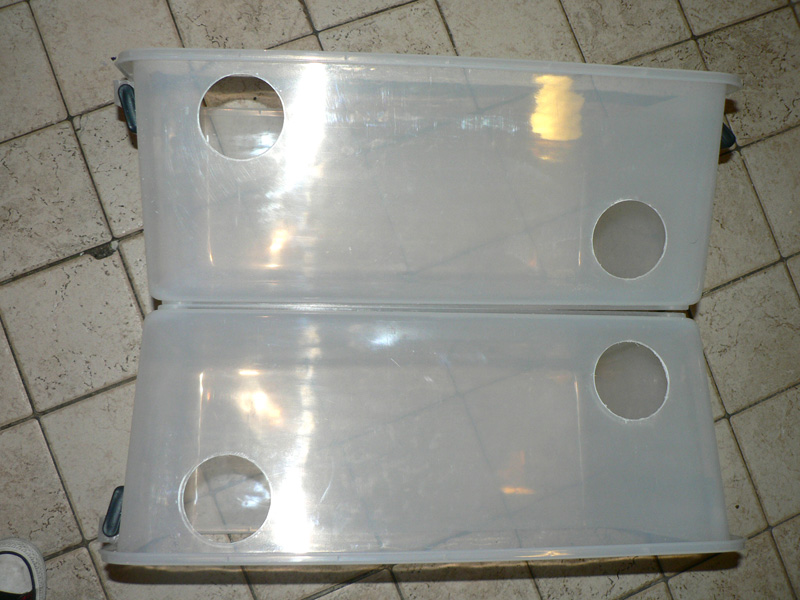
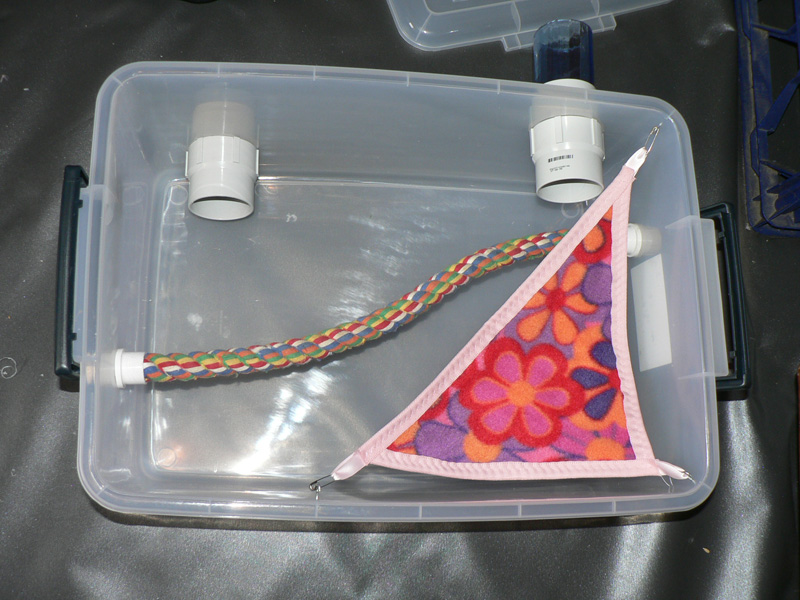
Take your hole saw, make sure you have the right size to allow the threaded parts of the PVC joiners to slip through but not much bigger. I like to have one connecting pipe towards the top of the cage and one at floor level, accounting for the depth of the litter, for variety. The [ female thread / large diameter ] to [ small diameter / male thread ] combination fits more closely than the [ male thread / large diameter ] to [ small diameter / female thread ] combination in my experience. Because the sides of the tubs slope outwards slightly, the connectors at the top of the tub need to fit more closely, or the tubs will not sit parallel. There are lots of ways you can use different parts of PVC joiners to connect your tubs, so feel free to experiment.


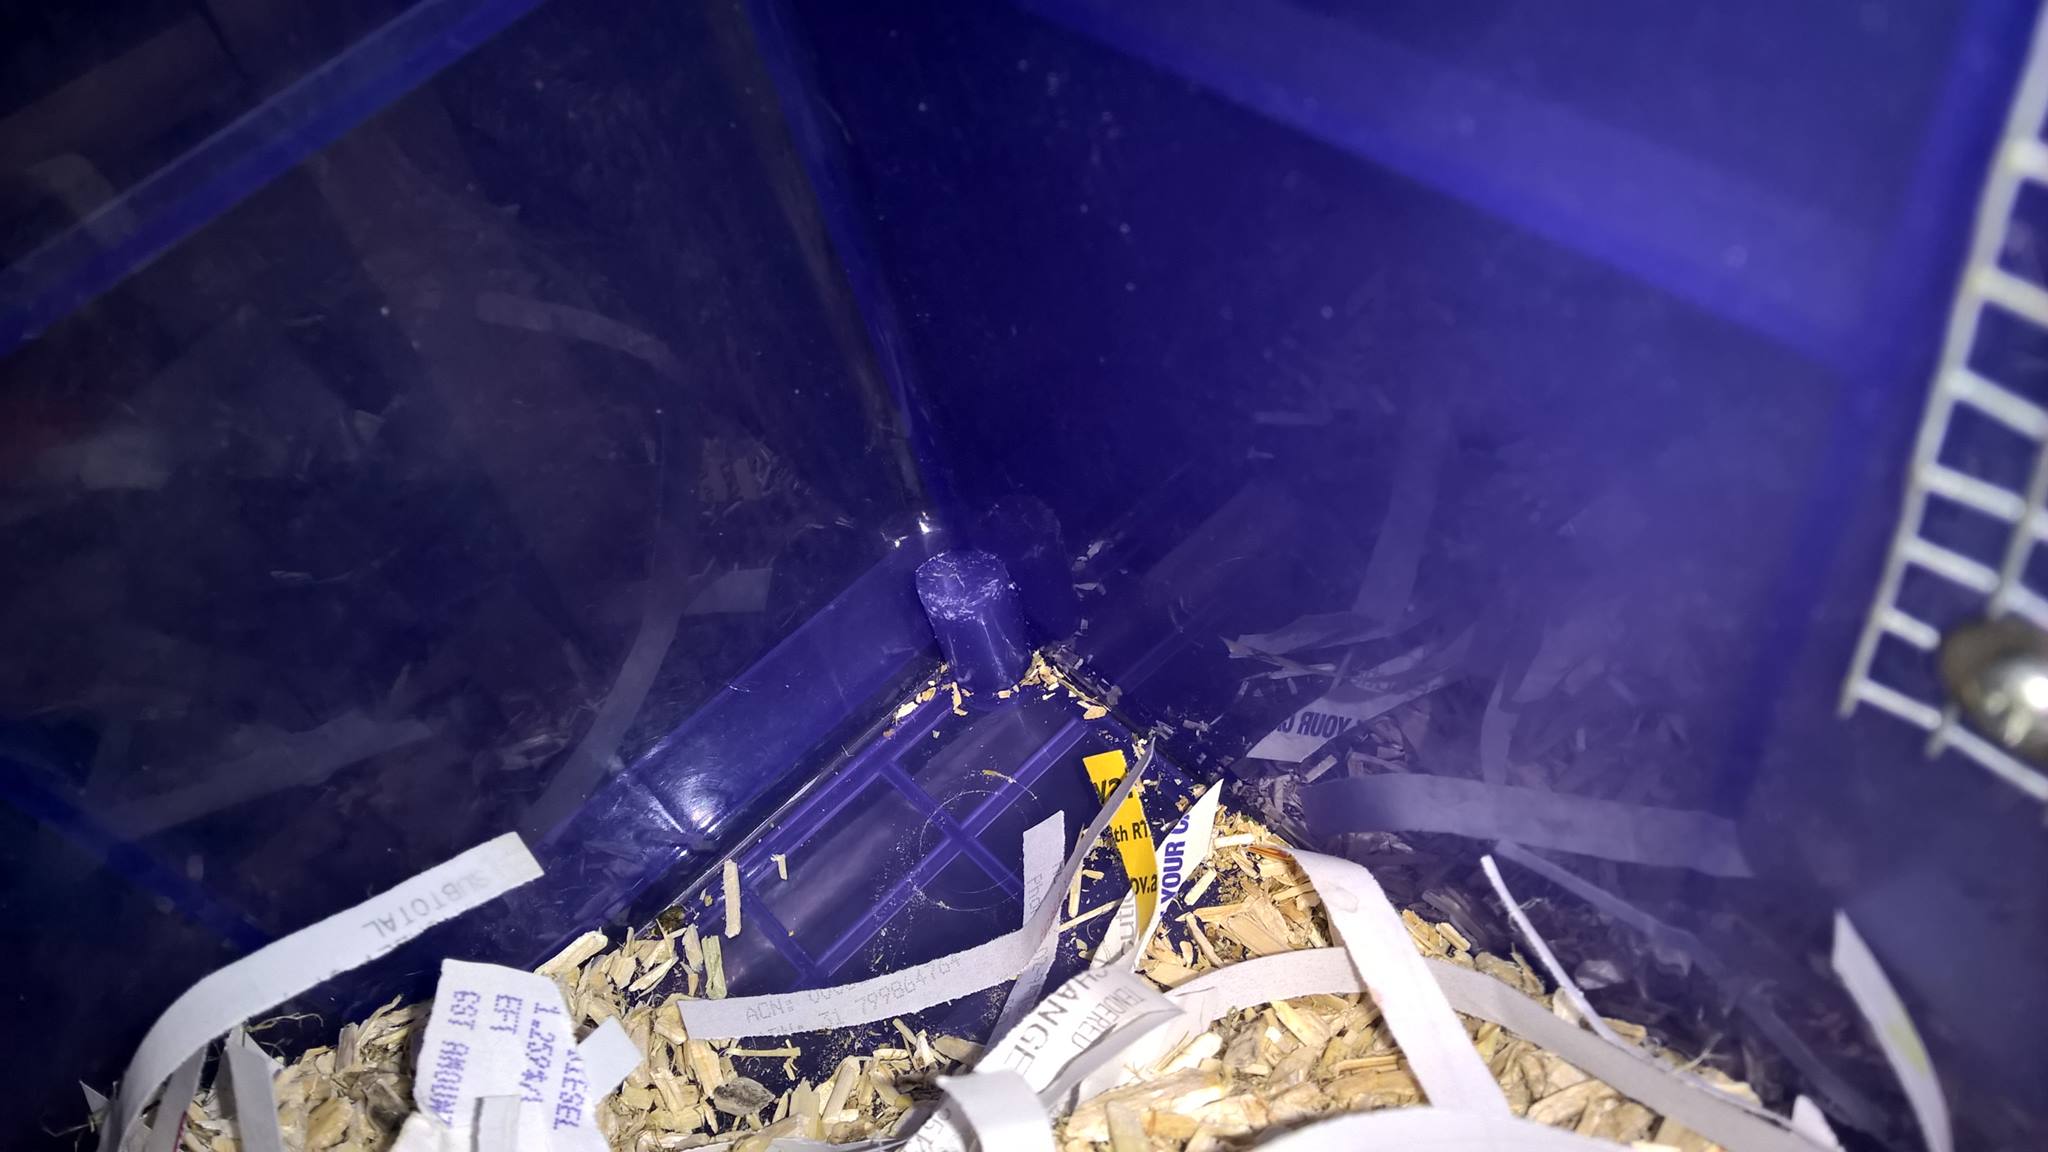
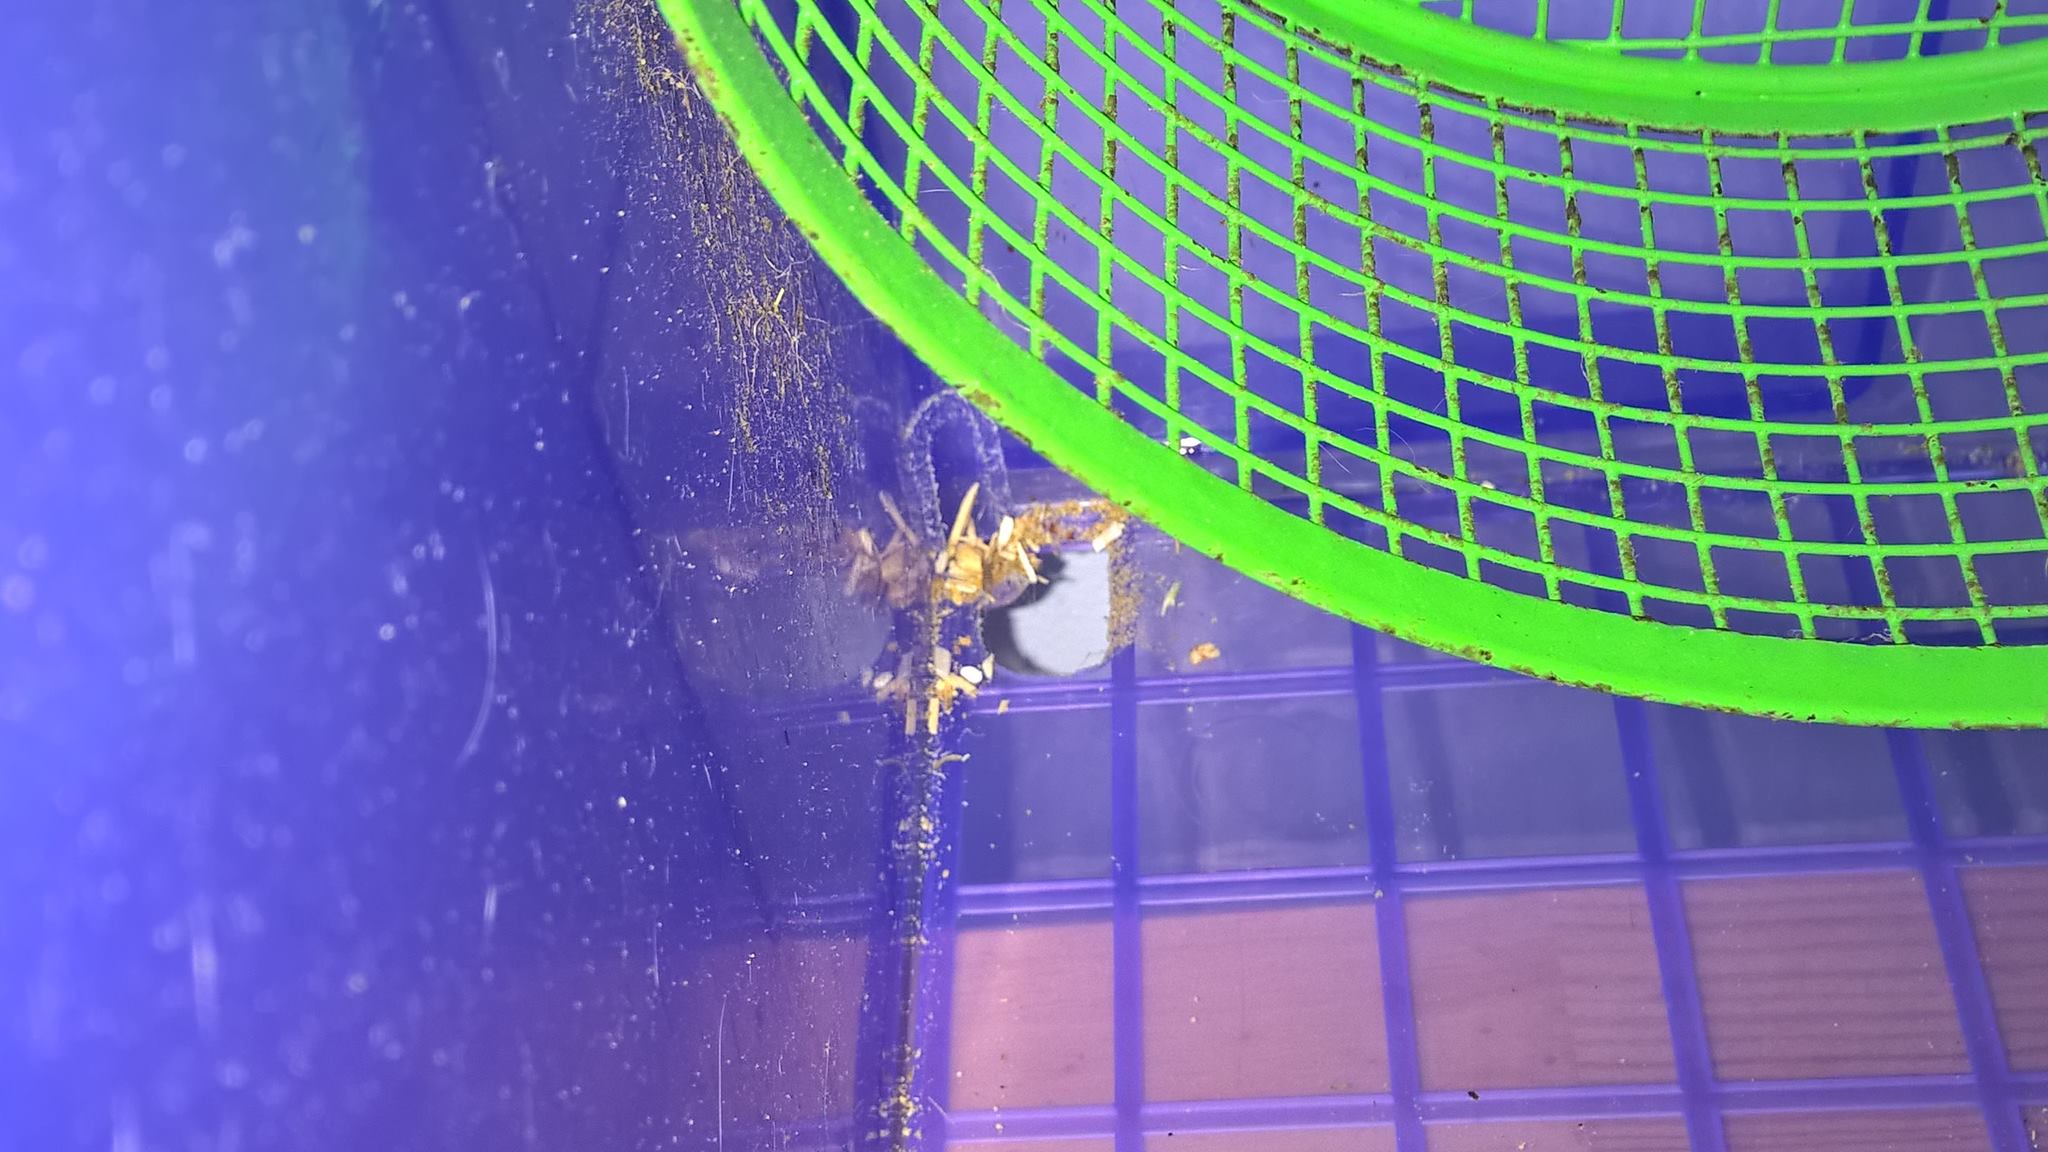
Warning!
A special addition from Wendy Culshaw – what happens when you use tubs that have mouldings on the inside. You can see how small the little corner shape is, probably just so the tubs can be easily stacked. But little mousey teeth are sharp and determined! Before and after shot of this lovely example.